Thanks for signing up for our course on getting the most out of your X-Plane 11 demo. Your guide to installing and setting up X-Plane is on its way to your email account now. Here’s what’s in that email:
Your guide to setting up X‑Plane
Hello from the X‑Plane customer support team! We’re sending you this message because you signed up for a free email course on getting the most out of your experience with X‑Plane. We promised to start by sending you instructions on setting up the demo—that’s what this email is about. We hope you’re as excited for your first flight in X‑Plane as we were!
At the end of this email are links and instructions for downloading 5 of our favorite freeware aircraft.
Our goal here is to get you up-and-flying in as little time as possible, while still learning the most important things about the simulator. This should only take about 10 or 15 minutes after you finish installing the demo.
Before you begin, you might want to check out the system requirements for X‑Plane 11. The super-short version is that if you have a fairly new computer, or a computer that’s maybe 2 or 3 years old which was very powerful when you bought it, you should have no trouble running X‑Plane.
If you have a problem that isn’t addressed in this guide, check the X‑Plane 11 manual or the X‑Plane Knowledge Base for answers.
Installing the demo
If you’re getting this email, it means you’ve already downloaded the demo installer, so it’s saved on your computer. (Can’t find it? You can download it again if necessary.) So, to install the demo, do the following:
- Locate the file you downloaded (it’s named something like “X‑Plane 11 Installer”) and double-click on it.
- In the window that appears, click the Install a free demo of X‑Plane button.
- Accept the user agreement by clicking on the check box, then click Continue.
- After a moment or two, the installer will ask you where to install the demo. Simply clicking Continue will install it on your Desktop (the recommended location).
- The installer will begin downloading the files it needs. When it finishes, you’re ready to fly!
Launching X‑Plane
Having finished the installation, it’s time to start the simulator!
- Before beginning, make sure your joystick or yoke is plugged in to your computer (if applicable). You certainly don’t need a joystick–you can fly with just your keyboard and mouse–but you’ll have a better experience if you’re using a joystick. If you don’t have flight controls, we use (and love) Saitek’s X52 joystick and throttle system. If you’re more interested in a yoke, check out CH Products’ Flight Sim yoke.
- Double-click on the X‑Plane 11 folder on your Desktop.
- In the window that appears, double-click on the icon labeled “X‑Plane.” At this point, X‑Plane will begin starting up.
- During this first launch, if you’re using any USB hardware, you’ll need to configure it. X‑Plane should prompt you to automatically configure your joystick or yoke. In the warning box that appears, click the Open Joystick Calibration button and move your joystick through all the available axes. Continue through the next two screens to finish calibration.
- Complete the opening tutorial to learn the basics of X‑Plane’s controls.
If you are using a joystick or yoke to fly, you can check out detailed instructions on setting up your hardware here in the manual. Otherwise, let’s get flying!
Flight School
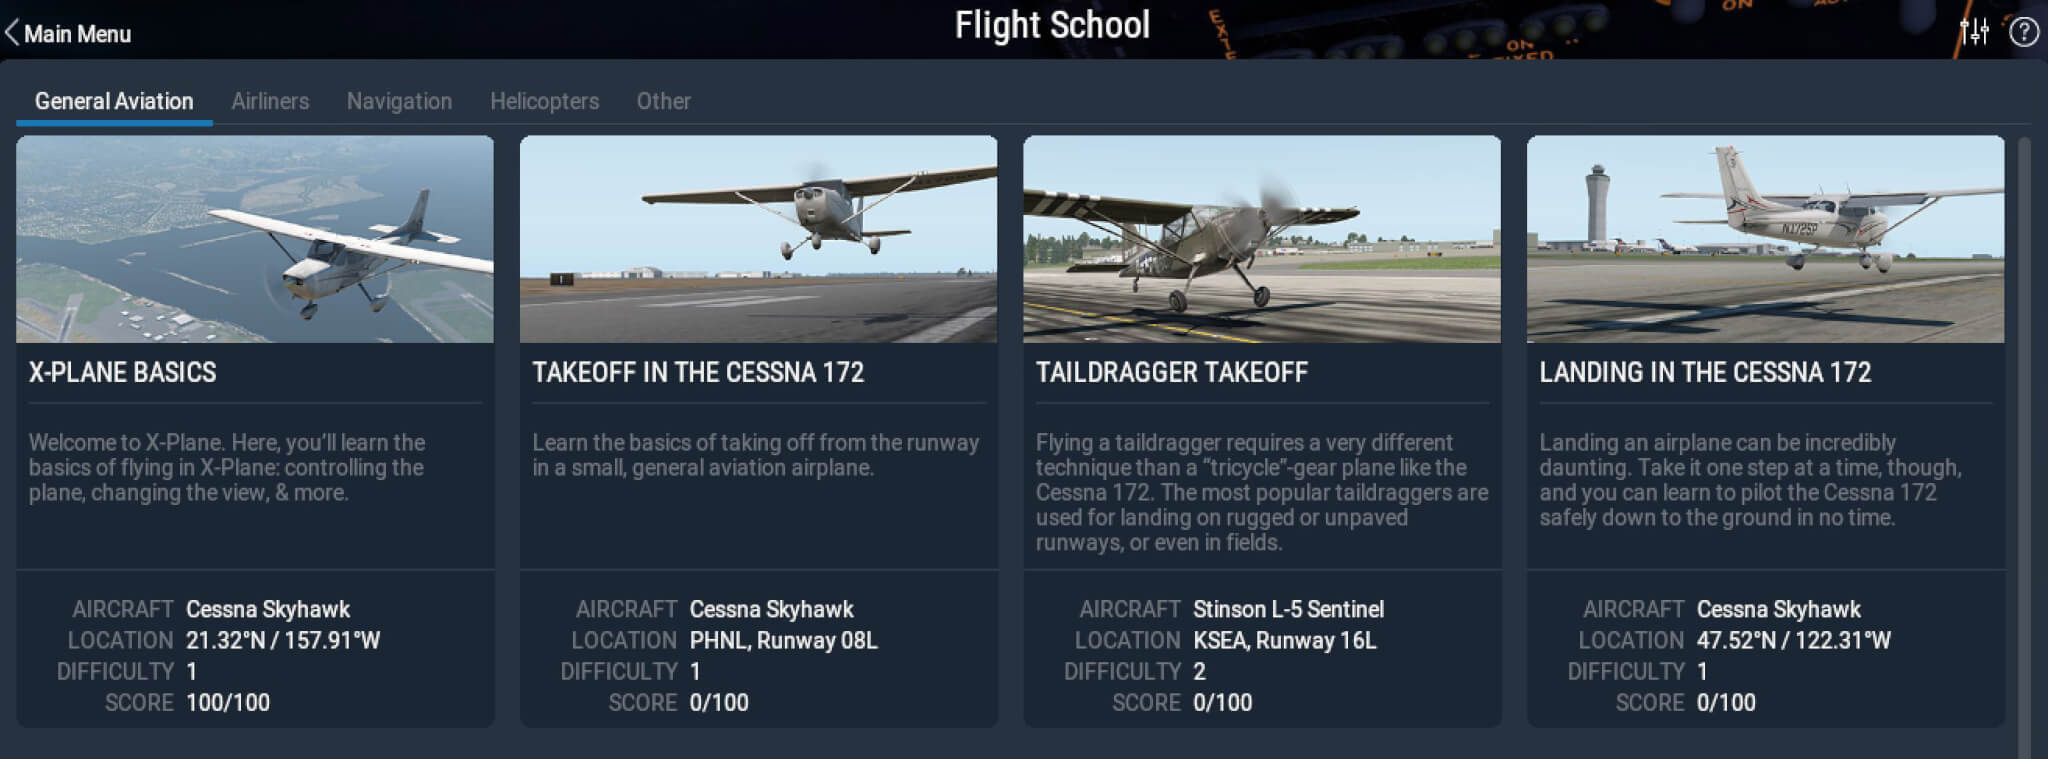
X‑Plane uses flight model calculations on every part of the plane to create super realistic flights. So, if you’re brand new to X‑Plane or flying in general, it might seem daunting to get started. It’s a good idea to check out the tutorials available in Flight School to help get your bearings.
Click on Flight School from the Main Menu to pick from tutorials on topics such as taking off, ILS landings, and controlling helicopters.

If you’d rather take charge of every aspect of your flight, let’s check out Flight Configuration instead.
Setting Up Your First Solo Flight
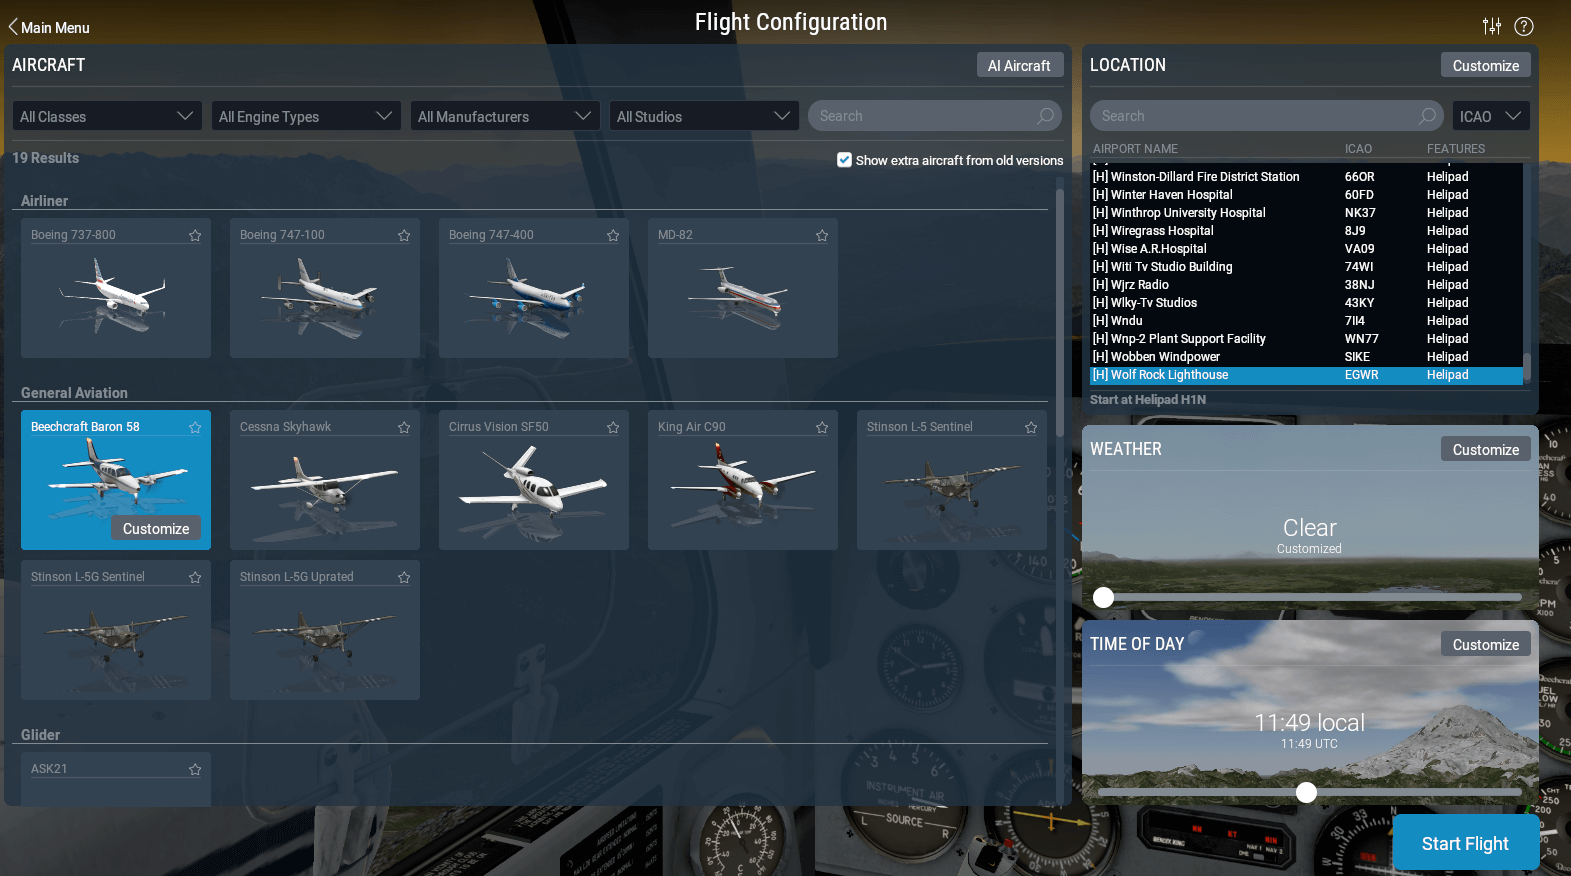
From the Main Menu pick New Flight to enter the Flight Configuration screen:

Pick an aircraft from the grid at the left. You can narrow down your options by using the drop down menus at the top of the screen or the search bar. The Cessna Skyhawk is a great beginning choice. (In the image above, we’ve selected the Beechcraft Baron.)
Pick an airport to start at in the upper right box (labeled “Location”). Since the demo version of X‑Plane doesn’t include any scenery outside of Seattle, you probably want to select Seattle International Airport, whose identifier is KSEA.
Underneath the airport are boxes for “Weather” and “Time of Day.” You can drag each of the sliders up and down to change these settings if desired.
When you’re ready to go, click the Start Flight button in the bottom-right of the screen.
You can get back to this screen at any time during your flight by clicking on the aircraft icon in the right side of the menu bar, or by returning to the Main Menu screen and picking Flight Configuration.
That’s all you need to know to use X‑Plane!
If you found this guide useful, you’ll love the emails we’re prepping for the future.
If you’d like more information on any of the topics covered here, check out the X‑Plane 11 User Manual.
If you’re having trouble getting X‑Plane to run smoothly on your computer, check out the guide to “Setting the Rendering Options for Best Performance” in the X‑Plane 11 manual.
Now, about those aircraft…
You want to get the most out of X‑Plane, and a big part of doing so is having lots of aircraft that you love to fly. So, use the following links to download 5 awesome models created by the X-Plane community!
(Links may require free registration before downloading.)
Installing new aircraft models
When you download a custom aircraft from the web sites above, it will typically be in a compressed folder (usually a ZIP file) that contains the airplane and all its various paint jobs, airfoils, etc. Once that compressed folder is downloaded, you should be able to double-click on it to open or expand it.
You should move the contents of that compressed folder into the folder called “Aircraft” within the X‑Plane 11 directory. (If you followed the instructions above, you should be able to find the X‑Plane directory on the Desktop.)
So, to install your custom aircraft, just:
- Double-click on the X‑Plane folder on the Desktop.
- In that folder, double-click on the “Aircraft” folder.
- Open the compressed folder that you previously downloaded and drag-and-drop its contents into the “Aircraft” directory window.
With the new aircraft in the proper directory, open up X‑Plane. In the aircraft selection portion of Flight Configuration, you can now click on the aircraft you just added. Cool!
At this point, all that’s left is to go flying!
Until next time,
– X-Plane Customer Support